The skeleton of your future home now sits outside, waiting for you. Luckily, after all your hard work, it’s time for a breather. The next steps, though slightly tedious, are much easier than the last few steps, as far as skill and decision-making go. By the end of this chapter in your personal tiny house building adventure, you will have a fully sealed, self-supporting structure, and though it might not be an ideal living space yet, you’ll be able to confidently say that, with your own two hands, you put a roof over your head, which was a big moment for me.
We start off by adding extra support to the tiny house with metal banding and fasteners for the hurricane rods (if your trailer has hurricane rods).
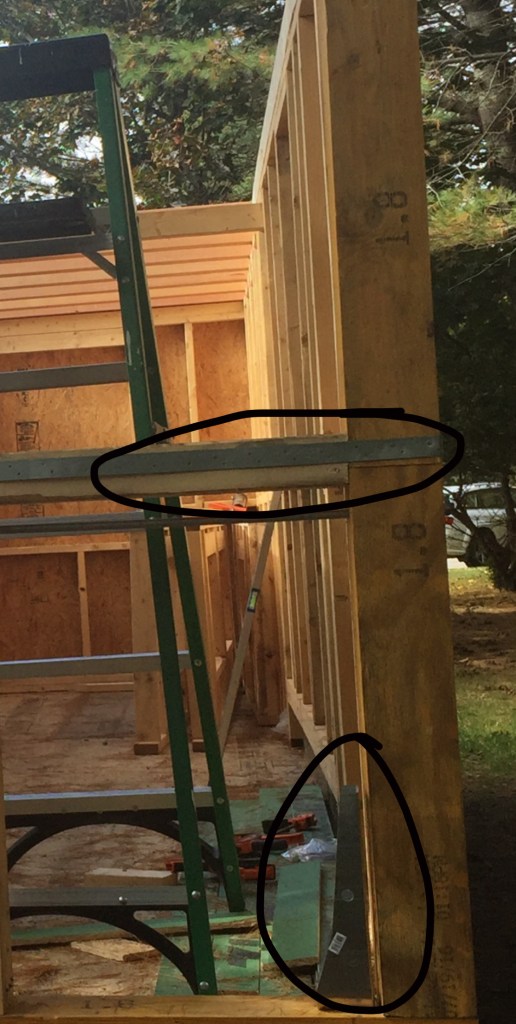
Though it’s hard to tell in this picture, the metal banding has hundreds of nails in it, all of which have to be hand nailed. Because the holes in the banding are quite small, using a nail gun would be extremely difficult and could also result in serious injury if a nail missed the hole and ricocheted off the metal back at you. The hurricane rod fasteners are relatively simple to install.
It’s mostly a simple matter of nuts, bolts, and screws. However, if you wait to put them on until the sheathing is on like I did, you may run into issues getting the right angle on the screws with your drill as they’re in the corners of your house so the walls can get in the way.
Next up is your sheathing. Most of this process should be relatively easy but there’s still a couple things to keep in mind. You’ll cut out your windows later, so you can use big pieces of plywood to cover all the walls swiftly and without much issue. You may want a friend to help you, though, as big pieces of plywood are not only heavy, but lining them up correctly, finding your studs to nail them into, and holding them in place while nailing them on, is next to impossible alone. You also need to remember that before you put your sheathing on, you need to put liquid nail construction adhesive on all the studs to help keep everything together while you’re going on the road.
Another thing to plan for, before you start throwing pieces of sheathing on your house, is how big your sheathing boards are relative to the surface area of your walls. You want to do your best to have similarly sized pieces across your wall and to avoid having random slivers on the ends, you also want to stagger the boards so there are no continuous seams going from the top to the bottom of your wall. The most difficult part of this process for me, was making the cuts for the wheel wells. My mother actually had the idea of creating a template for the curve of the wheel wells using paper bags, a marker, and my knife.
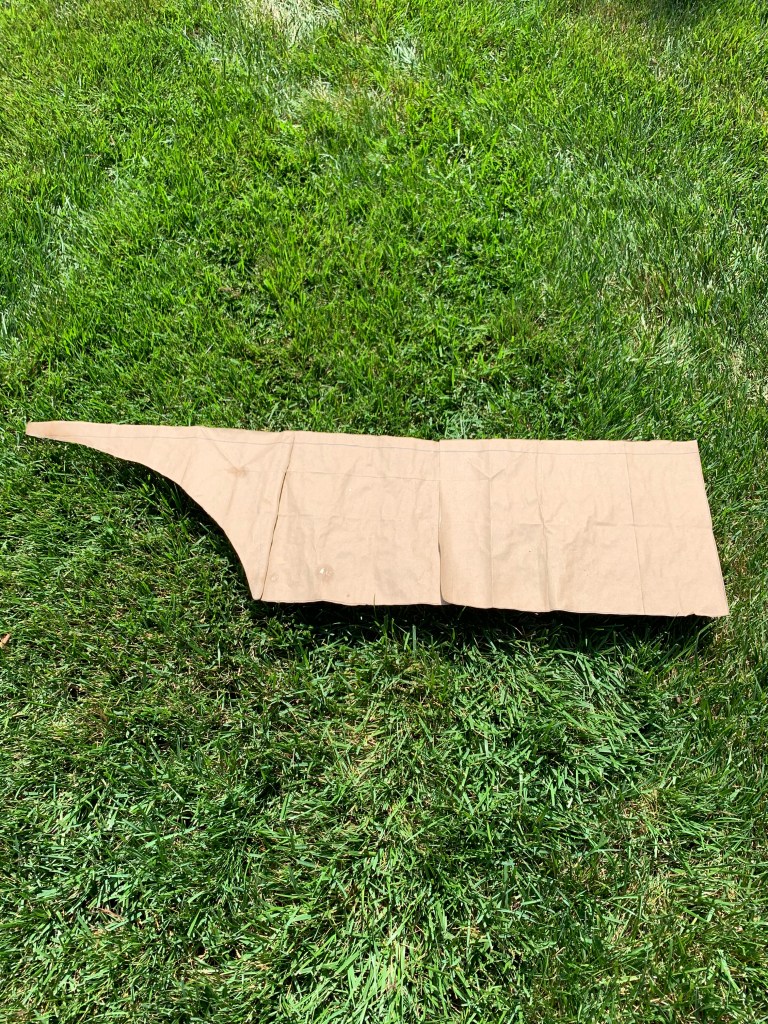
Just remember to keep whatever you use to help yourself make the cuts, because you’ll need to make them again when you get to the siding. One decision you will have to make in this process is whether you want to use ZIPsystem plywood or normal plywood and house wrap. Personally, I had no interest in dealing with house wrap and was assured by a good friend who works as a general contractor that ZIPsystem worked just as well, and so far I’ve had no issues with it, so that’s what I would recommend. However, house wrap is definitely the go-to for a lot of people and a very safe and reliable choice.

(If you frame your roof before sheathing, then your house will also have roof beams. However, I framed and sheathed my walls before constructing my roof)
After sheathing your house, you’ll need to go over all the seams with heavy duty, weatherproof construction tape, and you’ll need to lay down three beads of latex construction adhesive on the wheel wells. Unless you’re a wizard, there are going to be gaps between your wheel wells and the sheathing, so you’ll need to make sure the first bead completely fills up the gap and seals the bottom of the sheathing to the wheel wells to make it waterproof. The next two beads will be done behind the first bead on the inside of the house to act as secondary barriers in case water finds its way through the first bead of adhesive.
Now it’s time to move to the roof. Just like the walls, you’ll start with metal fasteners, but this time, instead of one giant band, you’ll put one strip over every peak to lock all of the roof framing in place.
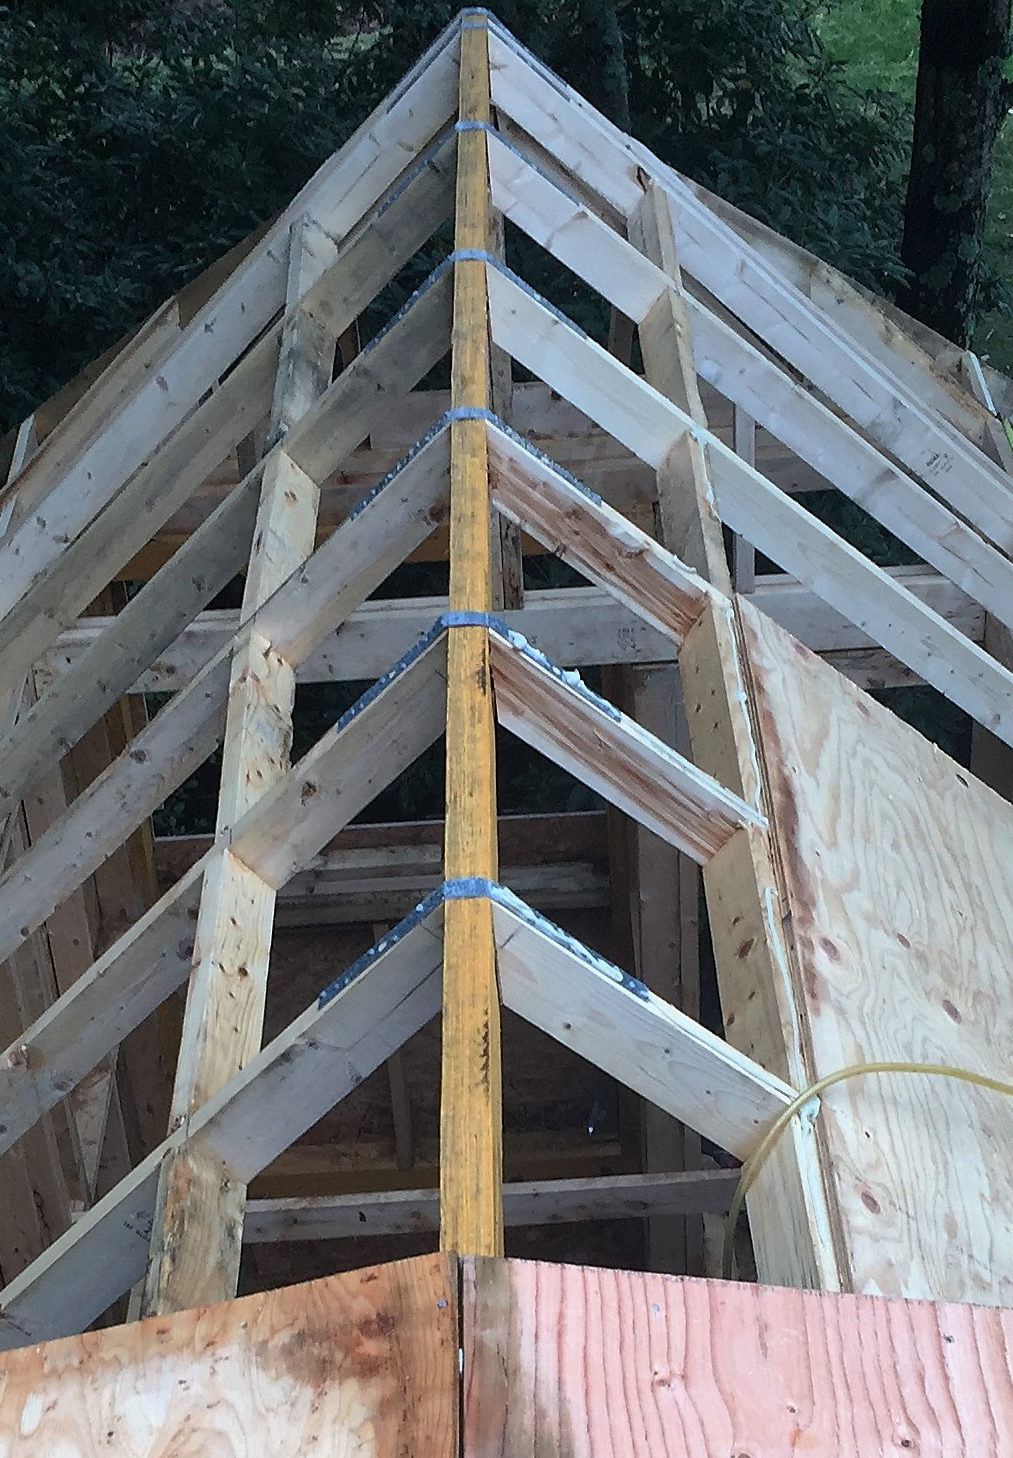
Once all the fasteners are in place, you can start sheathing the roof. I used normal plywood for the roof, because you’re going to need to install an ice and water shield over all your roof sheathing. Ice and water shields can be a huge pain to install because of how sticky it is, however, it heats up and gets its stickiest when it’s in the sun, so a good installation tip is to wait for a cloudy day (NOT a rainy day) and install it then. It’ll be sticky enough to stay on the roof but not so sticky it becomes painful to deal with. Then, once the sun comes out, it’ll heat up and fully attach to your roof.
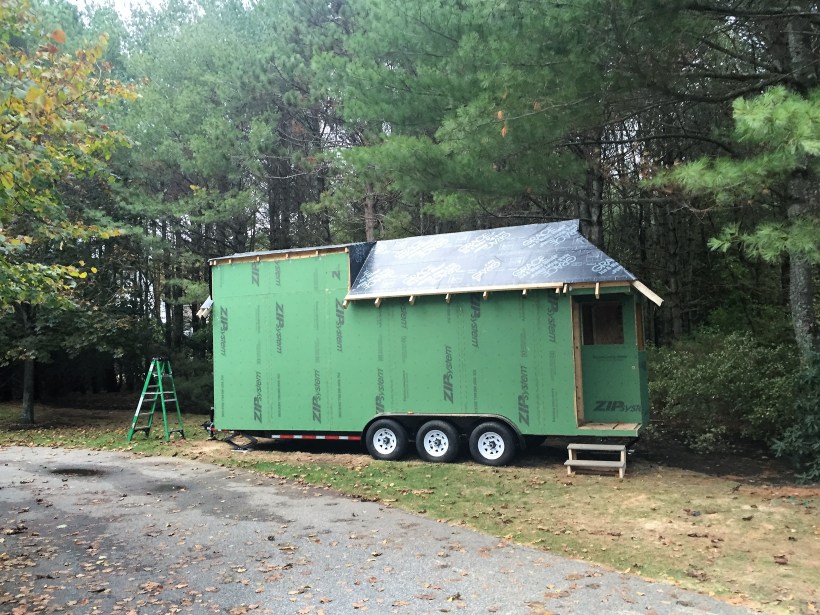
Well that’s about it. You’ve sheathed and weatherproofed your tiny house. It may not be luxurious, but hey, it’s habitable! It’s off the ground and safe from the elements, and so far, you’re turning out to be a pretty good carpenter.
That’s it for me, today. Hopefully, you learned something new or at least enjoyed the journey. Have a great day! And remember, if you decide to build a tiny house and only make it this far,
you can tell your kids it’s an on-the-ground treehouse and stick a wifi router out there, you might actually get some peace and quiet in your real house! Or stick your mother-in-law out there when she tries to visit and say it’s the guest house!
Disclaimer: I am not a certified contractor. All information and advice result from personal experience and should not be taken as professional guidance or used as step by step instructions on how to build a house. This is simply an attempt to give insight into the decision making process and to share my own journey building a tiny house. Not all information may be accurate to your situation, and personal research is encouraged before making any decisions.
