So, you’ve gotten your trailer, installed a subfloor, and are fully committed to your tiny house dreams. By now, you should also have blueprints, or at least a well thought out plan regarding how you want your tiny house to look. But maybe you’re ambitious, with a touch of crazy, and said, “what the heck, I can build a subfloor without instructions”, and you still don’t know what design you’re going for with your tiny house. Now is the time to figure that out, because the frame will determine the layout of the house such as; Where are your windows going to be? Do you want a loft? Do you want dormers? And what is the best placement for your front door?
Let’s start by looking at some different tiny house plans and what you might want to consider in your design. A loft will give you a great place to put your bed and, I strongly recommend one. However, keep in mind that the roof will be really low in a loft, so if you’re super tall you might want to reconsider as not only will it be difficult to sit up and move around, but you may also not be able to stand up underneath the loft, which would make half your house extremely annoying to traverse through and potentially lead to some serious neck and back pain down the road.
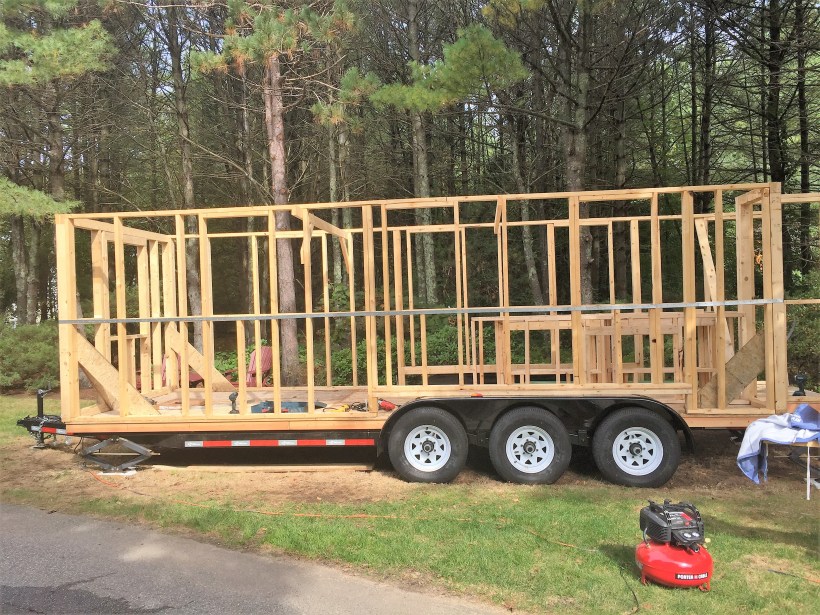
The next thing to look at is the number and placement of your windows. The tiny house plans I used (which I bought from the Tumbleweed tiny house company: Cypress tiny house plans) had me frame positions for up to FIFTEEN windows, and I’m using fourteen of them. Tiny houses are small and can get rather stuffy, so natural light and the ability to open up the entire house are things I think are really important but it’s all personal preference. Another thing to remember is that most windows come in specific sizes, so planning ahead and making window frames to fit the windows instead of trying to find windows that fit your frames can save you a lot of headaches. If it’s too late for that, then you can always shim the windows with a little elbow grease. (Extra tip: If you can’t find windows that fit your frames remember that it’s easier and safer to make the window frames smaller than it is to make them bigger. Trying to make them bigger could compromise the structural integrity of your building well making them smaller just requires some extra wood being nailed into the frame).
Dormers are your next decision. I went for dormers and have no regrets, besides the extra cost you’ll incur on the dormer windows I really don’t see a downside, though if you decide against a loft then dormers may not make sense. So basically, if you have the money and you’re going for a loft then I suggest dormers, if you’ve decided against a loft then dormers may not be worth the extra money and you could go with skylights if you want extra light instead of the extra framing and windows required for dormers.
The last big framing decision to think about is where you want your door, I put mine indented into the back of the trailer.
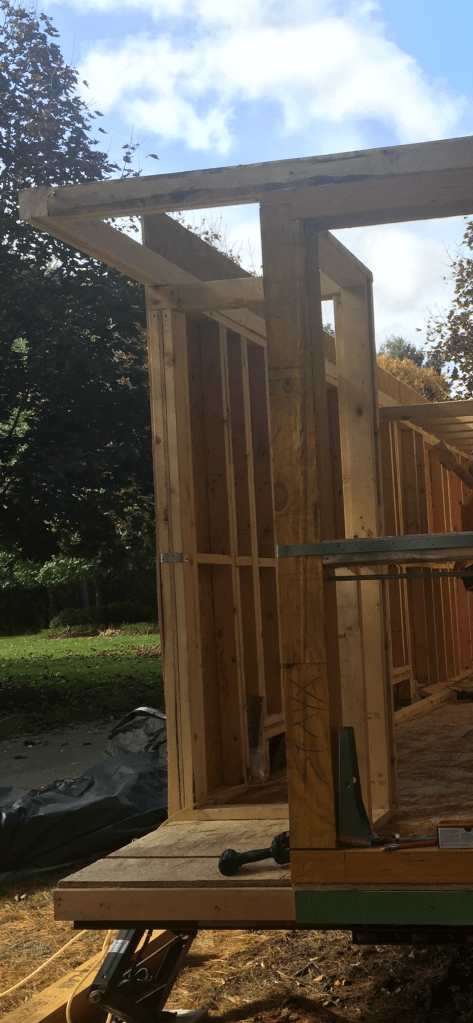
This is a nice style because it gives you a small porch that gives the house character and allows for a spot to close your umbrella or take off your shoes before entering your house, it also gives you a great spot for window seat or table in the area inside beside the door. This door placement does, however, cut into the inside space of your house so some people put their doors on the side of the house with no indent to save space on the inside and give themselves the full backwall to put stuff on, well other people go the opposite direction and put a porch spanning the entire back wall and center the door.
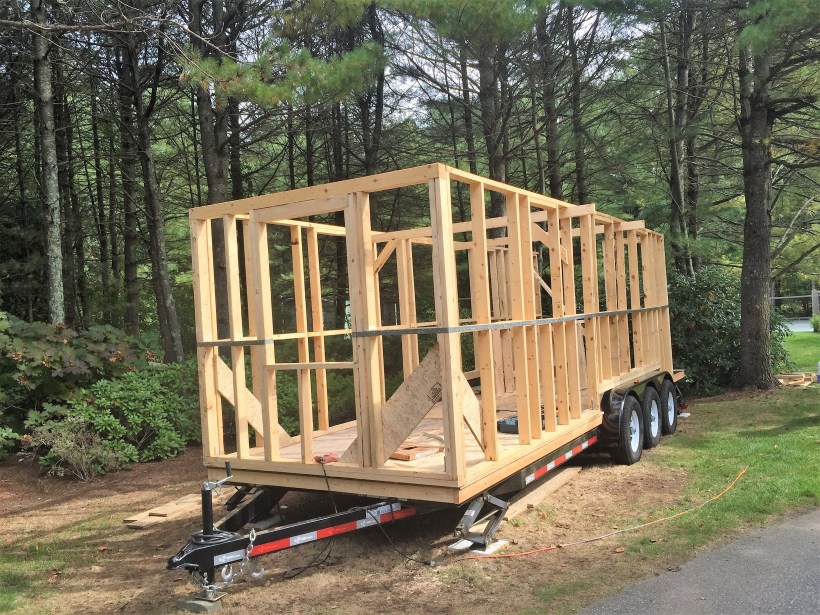
Now that you know how you want to frame your house, it’s time to finally roll up your sleeves and start building. Framing is kind of like piecing together a jigsaw puzzle, you build one wall at a time, on the ground, by laying all the wood down in the shape of the wall and then nailing it all together. Be sure to add temporary supports until all the walls are in place and the house is sealed up and stable as a stand-alone structure. The great part about building the frames is that, it can be built in pieces they can be made in your garage, near power outlets and out of the weather, before attaching them together outside.

You’ll definitely want to recruit a friend or two to help you lift and hold the frames in place.
At this point you’re doing great! you should be getting a handle on using your power tools, and you already have a structure that resembles a house, but the next part of your framing journey is going to seriously test your skills: it’s time to frame your roof. You need to make a final decision on dormers and a loft, and if you have friend with easily portable scaffolding now is the time to send them a fruit basket. While it is possible to frame the roof without scaffolding (I framed mine working on maybe 2 inches of wood scaffolding I nailed onto the outside of the framework and some makeshift scaffolding I built on the inside of the house) having it makes things a lot easier.
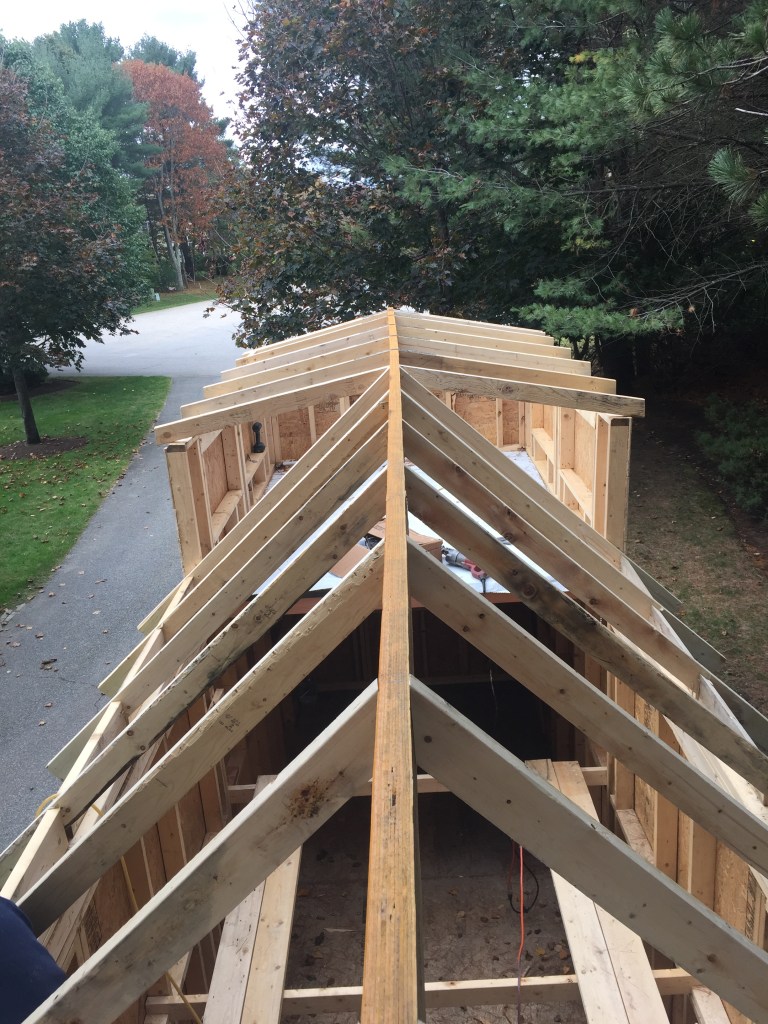
Putting the long center roof beam in place is rather difficult, and I again suggest recruiting, some help. You’re also going to need to make some pretty difficult cuts on the roof beams, so if you know anyone who’s experienced with power saws, they might end up saving you a lot of wood. You want to remember to build your loft beams and flooring so that it looks the way you want it to look at the end of the build as what you put in place now won’t be covered up later and it would be a pain to change. This also means you need to cover up the loft with a tarp and try not to scratch it while you’re working on it.
By the end of the framing process, you’ll have the skeleton of your house, be much more comfortable with your tools and being on the worksite, and be able to see your dream house taking shape. At this point you can actually tell people you’re building a house, which is kind of super cool!
That’s it for me today. Hopefully, you learned something new or at least enjoyed the journey. Have a great day! And remember, if you decide to build a tiny house and only make it this far, you can throw a tarp over the top and use it as a cabana!
Disclaimer: I am not a certified contractor. All information and advice result from personal experience and should not be taken as professional guidance or used as step by step instructions on how to build a house. This is simply an attempt to give insight into the decision making process and to share my own journey building a tiny house. Not all information may be accurate to your situation, and personal research is encouraged before making any decisions.
